
Toyota RAV4: Maintenance and care - Light bulbs
You may replace the light bulbs identified in this section yourself. The level of difficulty varies according to the bulb location and the access required. If a replacement procedure appears difficult, or if you cannot reach the bulb safely, contact a Toyota dealer rather than forcing any component.
For information about replacing any Toyota RAV4 exterior light not covered by the procedures below, consult your Toyota dealer.
Preparing for light bulb replacement
Before removing a bulb, confirm its specified wattage and prepare a suitable replacement of the same type. Turn off the applicable light and allow the bulb and surrounding components to cool before beginning the work.
Bulb location
Front (type A)
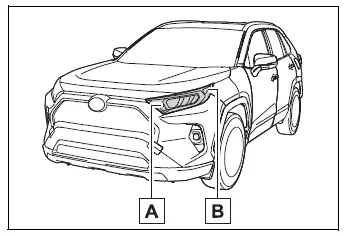
- Front turn signal/parking lights
- Front side marker lights
Front (type B)
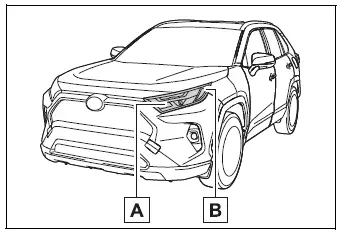
- Front turn signal lights
- Front side marker lights
Front (type C)
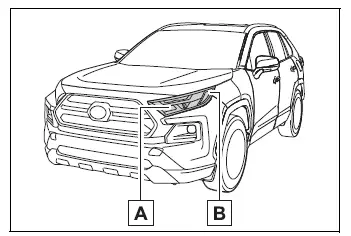
- Front turn signal lights
- Front side marker lights
Rear
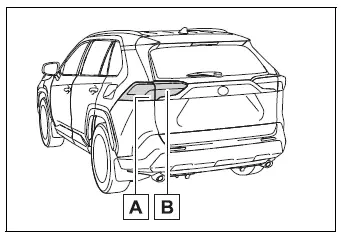
- Rear turn signal lights
- Back-up lights
■ Lights that need to be replaced by your Toyota dealer
- Headlights
- Front turn signal lights (LED type)
- Daytime running lights
- Parking lights (LED type)
- Front side marker lights (LED type)
- Fog lights (if equipped)
- Side turn signal lights (if equipped)
- Tail lights
- Stop lights
- Rear side marker lights
- High mounted stoplight
- License plate lights
- Outer foot lights (if equipped)
■ LED lights
Except for the lights listed below, each exterior light assembly contains multiple LEDs. Individual LEDs are not intended to be replaced separately. If one or more LEDs fail, have the complete light assembly inspected and replaced by a Toyota dealer.
- Front turn signal lights (bulb type)
- Parking lights (type A)
- Front side marker lights (bulb type)
- Rear turn signal lights
- Back-up lights
- Outer foot lights (if equipped)
■ Condensation build-up on the inside of the lens
A small amount of temporary condensation inside a light lens does not normally indicate a malfunction. Temperature and humidity changes can cause light fogging that disappears after conditions change. Contact a Toyota dealer for further inspection in either of the following situations:
- Large drops of water remain or accumulate on the inner surface of the lens.
- Water has collected inside the light assembly.
Replacing light bulb
■ Front turn signal/parking lights (type A)
1. Grip the bulb base securely and turn it counterclockwise until it releases from the light unit.
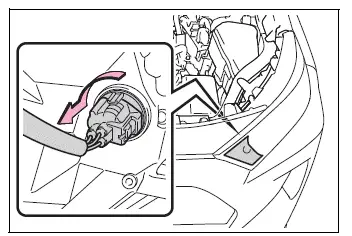
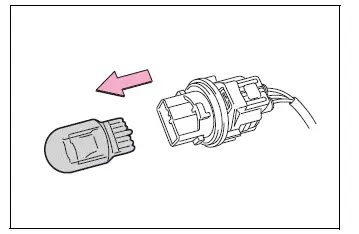
2. Pull the light bulb straight out of the bulb base without twisting or applying excessive sideways pressure.
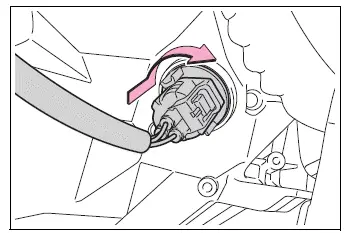
3. Insert a new bulb securely into the base. Position the bulb base in the light unit, then turn it clockwise until it locks firmly in place. Confirm that the base sits evenly so moisture cannot enter around the fitting.
■ Front turn signal lights (type B and C)
1. Turn the front turn signal bulb base counterclockwise to disengage it from the light housing.
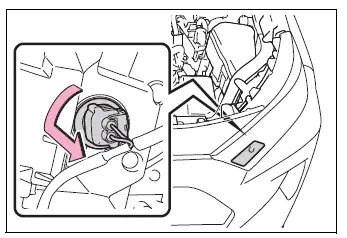
2. Remove the bulb carefully from the base, keeping the socket and surrounding area free from dirt or moisture.
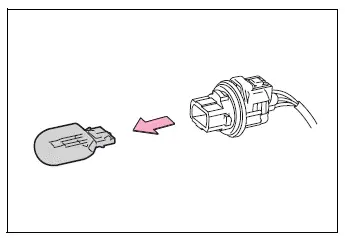
3. Install the replacement bulb in the base, insert the assembled base into the light unit, and turn it clockwise until it is securely locked. Test the Toyota RAV4 turn signal after completing the installation.
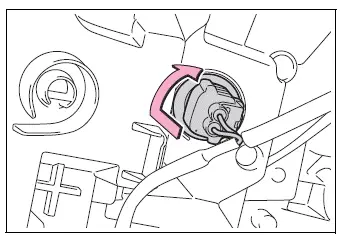
■ Front side marker lights (type A)
1. Rotate the front side marker bulb base counterclockwise and remove it gently from the light unit.
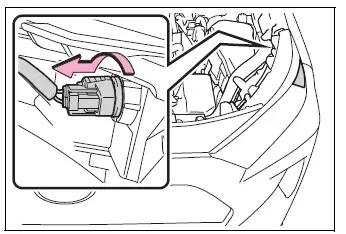
2. Pull the existing bulb straight out of its socket. Avoid bending the socket contacts or placing unnecessary pressure on the bulb base.
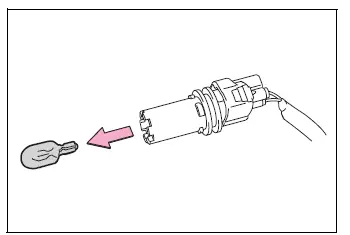
3. Insert the new bulb fully, place the bulb base back into the light unit, and turn it clockwise until it is locked in its original position.
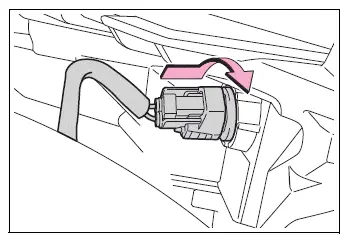
■ Front side marker lights (type B and C)
1. Grip the bulb base securely and turn it counterclockwise until it disengages from the light unit.
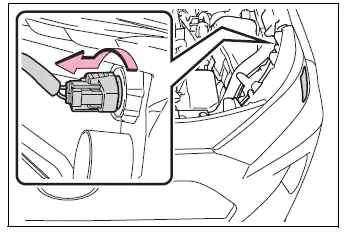
2. Pull the light bulb straight out of the base, taking care not to bend the contacts or damage the surrounding socket.
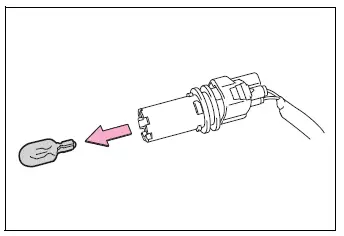
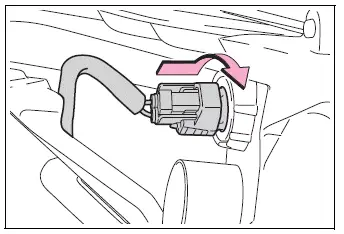
3. Insert the replacement bulb fully into the base. Refit the bulb base into the light unit and turn it clockwise until it is seated and locked securely.
■ Rear turn signal lights
1. Open the back door and carefully remove the access cover to reach the rear turn signal light assembly.
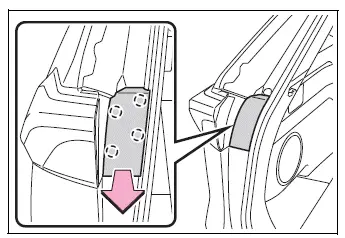
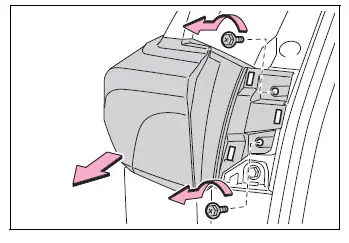
2. Remove the retaining screws, then detach the light unit from the Toyota RAV4 body.
Pull the lamp assembly directly toward the rear of the vehicle. Avoid twisting or moving it sideways, as this may damage the locating pins, claws, or surrounding bodywork.
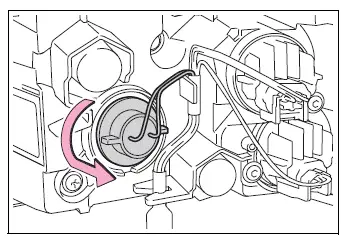
3. Hold the rear turn signal bulb base and rotate it counterclockwise until it releases from the lamp assembly.
4. Remove the old bulb from the socket by pulling it straight outward without applying unnecessary sideways force.
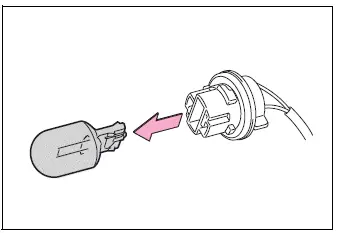
5. Install the replacement bulb securely. Insert the bulb base into the light unit and turn it clockwise until it locks into position.
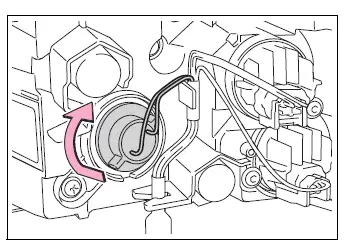
6. Align the grooves on the light unit with the corresponding body claws, then insert the assembly straight into position so that its locating pin enters the correct hole.
Check the full perimeter of the light unit and confirm that it is seated evenly and completely secured against the Toyota RAV4 body.
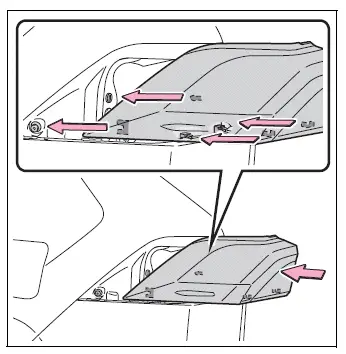
7. Reinstall the retaining screws and tighten them securely without applying excessive force.
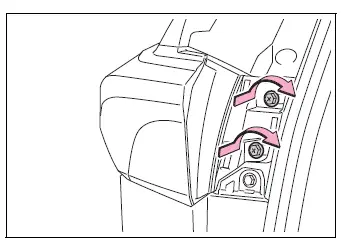
8. Refit the access cover and press around its edges until all retaining points are engaged properly.
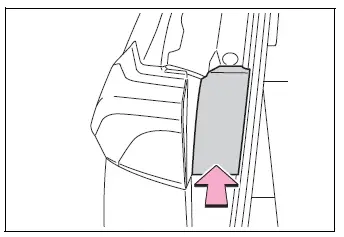
■ Back-up lights
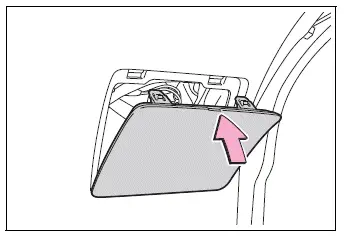
1. Open the back door and carefully remove the back-up light access cover.
Wrap the tip of a suitable screwdriver with a clean rag before releasing the cover. This helps prevent scratches, dents, or other damage to the cover and surrounding trim.
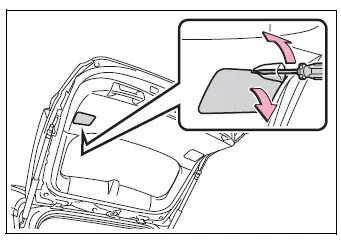
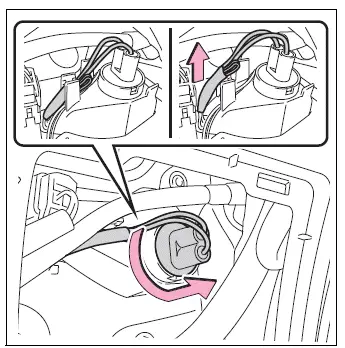
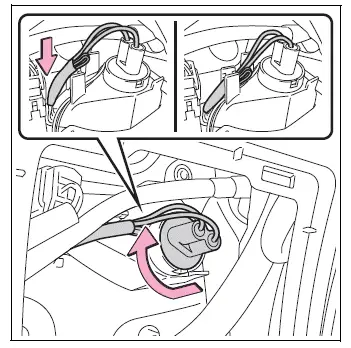
2. Release the electrical cord from its retaining clip, then turn the bulb base counterclockwise and remove it from the light unit.
Moving the cord out of the clip first provides enough clearance to rotate the base without pulling or placing strain on the wiring.
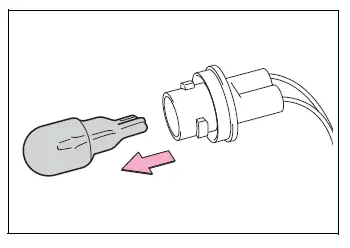
3. Pull the existing back-up light bulb straight out of the socket, keeping the bulb base and electrical contacts clean.
4. Insert the new light bulb fully into the bulb base and confirm that it is seated evenly.
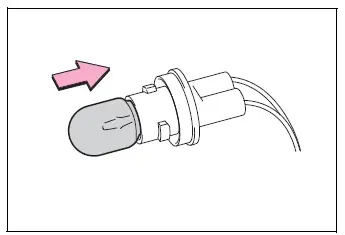
5. Insert the bulb base into the light unit and turn it clockwise until it locks securely.
After installing the bulb base, return the electrical cord to its retaining clip. Make sure the cord is held correctly and is not pinched, stretched, or positioned against a sharp edge.
6. Reinstall the access cover and press it into place until it is flush with the surrounding trim and all retaining points are engaged.
WARNING
■ Replacing light bulbs
- Turn off the applicable light before beginning replacement, and do not touch the bulb immediately after it has been switched off.
The bulb and nearby parts can remain extremely hot and may cause burns. Allow sufficient time for all components to cool.
- Do not touch the glass section of a replacement bulb with bare hands. If handling the glass is unavoidable, use a clean, dry cloth to prevent skin oils, moisture, and dirt from remaining on its surface.
A bulb that has been contaminated, scratched, struck, or dropped may overheat, crack, or fail prematurely during operation.
- Install the bulb and every retaining component completely and securely. An incorrectly seated bulb can create excessive heat, allow water to enter the light unit, or cause a fire. Moisture entering the housing may also damage internal parts or produce persistent condensation inside the lens.
- Do not disassemble, modify, or attempt to repair light bulbs, electrical connectors, wiring circuits, or related components.
Incorrect work may expose electrically energized parts and could result in electric shock, death, or serious injury.
■ To prevent damage or fire
- Make sure every replacement bulb is fully seated and that its base or retaining mechanism is locked securely before operating the light.
- Confirm that the replacement bulb has the specified wattage before installation. A bulb with an incorrect rating can generate excessive heat and damage the Toyota RAV4 light assembly or surrounding components.